29 Aug
Google Tag Manager is a user-friendly, web-based interface tool that simplifies the whole process of working with tags. Without touching the source code, GTM lets you add, change, and disable tags.
Understanding how users engage with your site is crucial regardless of the type of site you have, be it a big e-commerce site, a personal website, or one for a small business. While Google Analytics can offer many of the crucial data you seek, it does have some restrictions when utilised by itself. In contrast, you can gather a lot more information by tagging your website and using Google Tag Manager in collaboration with Google Analytics.
Perks of using GTM:
AMP sites
GTM can be used with more than just conventional websites. It can also be used to control tags for AMP websites and mobile applications. GTM is quite helpful when it comes to mobile apps since it enables you to add and amend your tags without having to release an updated version of your app, which customers can be slow to actually download.
While there are some similarities between using GTM for AMP web pages or mobile applications and using it for normal websites, there are also significant distinctions.
Marketing made easy

The fact that Google Tag Manager makes it simpler for marketers to apply tags without having to rely on web developers to do it for them is by far its largest advantage. Tagging frequently takes a backseat to other high-priority initiatives since developers are typically preoccupied with other tasks.
However, since Google Tag Manager makes it possible to add and edit tags without touching the source code, marketers can do so rapidly.
Majority of business profit from employing GTM
Smaller organisations that have limited access to technical help can benefit greatly from GTM’s ease of adding and editing tags without the assistance of a developer. Additionally, because enterprise-level commercial websites sometimes employ dozens of tags, GTM makes it simpler to manage them all and increases site speed by assisting in their faster loading.
We’ll concentrate on utilizing GTM on the web in this manual.
Installing Google Tag Manager (GTM) on website:
Step #1 – Set up a GTM account
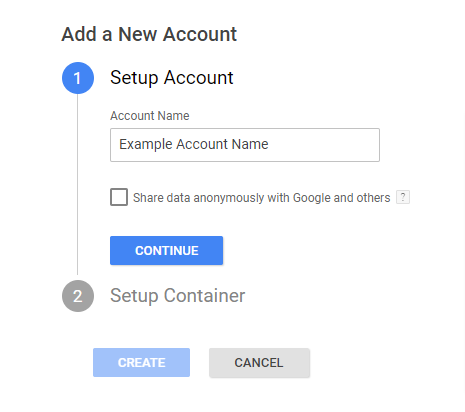
Create an account at tagmanager.google.com to get going. Enter the name of the business whose website is being handled under “Setup Account” and click “Continue.”
Moving on, the next step is to set up your container. Select the sort of website or app it will be used on, enter your domain name as the container name, and click “Create.” You must also indicate whether you’re utilising the Firebase SDK or a legacy SDK if you select iOS or Android.
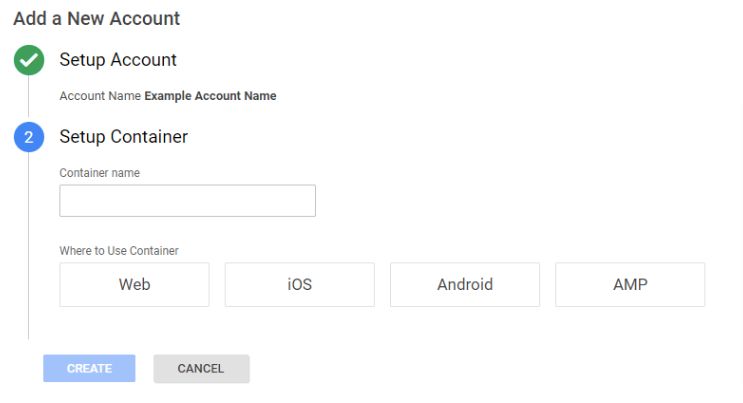
Although Google recommends creating one container per domain, several GTM accounts can be handled inside a single GTM account. All tags can be contained within a single container; no need to make a new container for each tag or each page on a website.
The majority of businesses and organizations just require one container. However, if a corporation has affiliates or owns many businesses, each business’ website should have its own container, which may all be handled from the same primary GTM account. A site’s subdomain should be given its own container if it is handled differently from the main domain.
Google advises businesses to create their own GTM accounts and then add the marketing agency’s Google account as a user when an agency is handling tags on their behalf. In this manner, the agency has access to GTM, but the firm can easily remove access if they decide to switch agencies.
Step #2 – Install GTM to your site: Add script to your theme
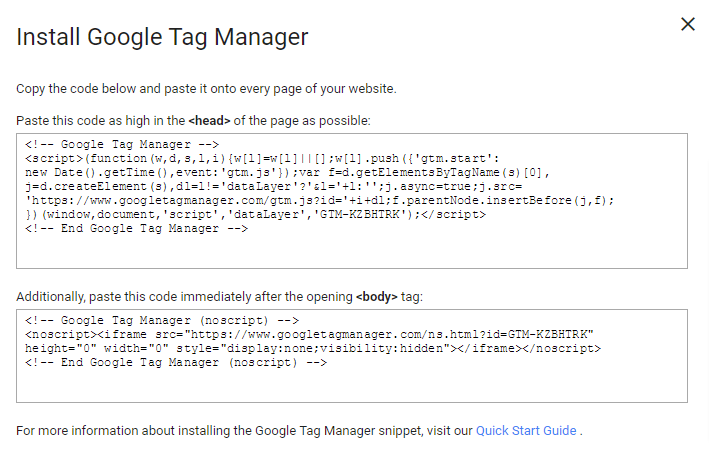
After creating your container, accept the GTM terms of service and you’ll be given your container code.
Step #3 – Create a Tag
You will reach the workplace screen on your GTM account after finishing up your setup.
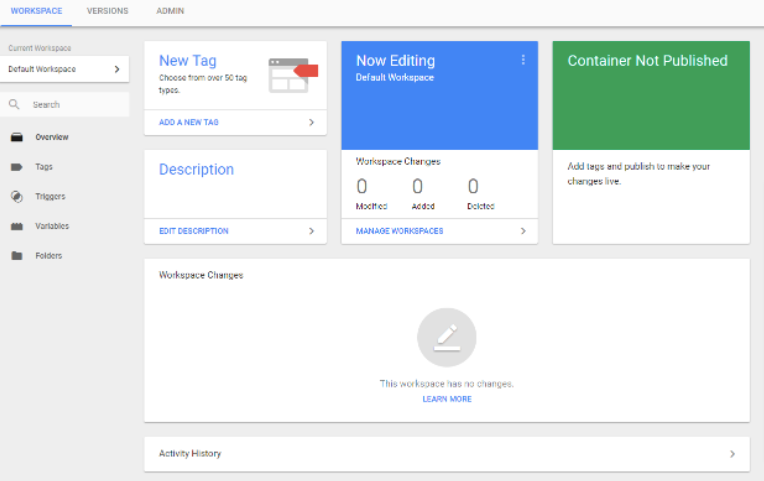
You may name and customize your tag in the box that appears when you click “Add a New Tag.”
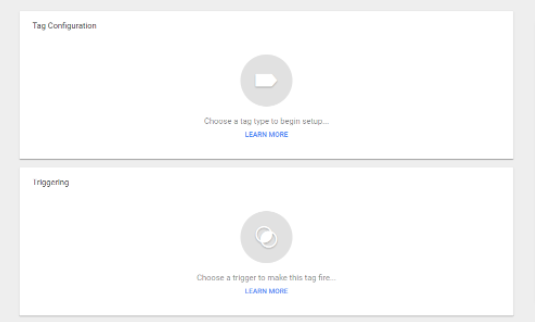
This box appears when you click “Add a new tag” on the dashboard. You will be presented with a lengthy list of tag templates, many of which incorporate the most popular sorts of tags, when you select “Tag Configuration.” Click on one of these and fill out the form if it’s what you’re searching for. Select “Custom HTML” to add your own code if the sort of tag you wish to create isn’t mentioned.
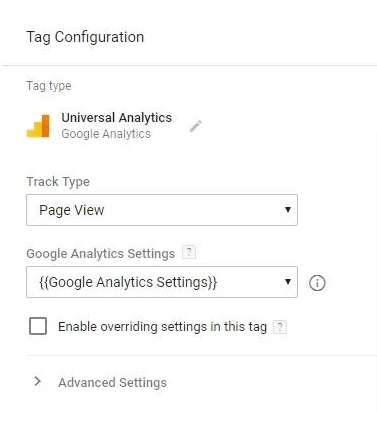
After choosing Universal Analytics, the above image is what I’d see!
Now, input the variable with the details of my Google Analytics account after selecting “Page View” from the “Track Type” dropdown option. If I hadn’t already established that variable, I could do so right away by selecting “New Variable” from the dropdown menu next to “Google Analytics Settings.” Click on “Advanced Settings” for changes.
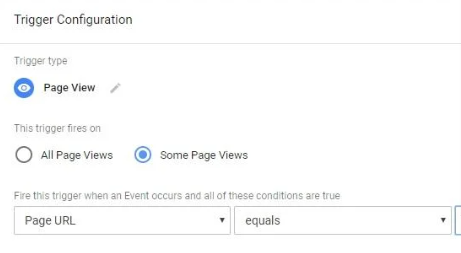
I would choose “Some Page Views” only since I only want my tag to fire on one page. I could set up a new filter by clicking the plus sign (+) next to the one I wanted to add. The only thing I would need to do to remove one of the filters I had added to this tag in the future is click the minus (-) button next to it. Click outside the window when finished to leave.
Save it and you can preview your tag to make sure it’s working correctly before publishing it.
Step #4 – Debugging and publishing tags
Before publishing, you should test tags in GTM’s “Preview & Debug” mode to make sure everything is functioning properly and that no mistakes will cause your data to become inaccurate.
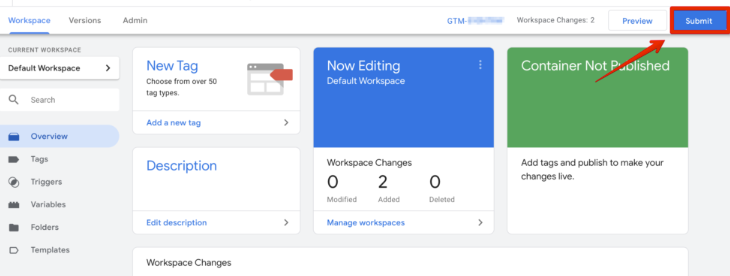
A new version of your container is created whenever changes are published in GTM. Simply click the “Versions” button at the top of the GTM dashboard, select the version you want to go back to from the list, click “Action,” and then “Publish” if there is ever an issue and you need to use an older version of your container.
How to Set Up Google Tag Manager in WordPress Without a Plugin?
You can also link your WordPress site and Google Tag Manager without any Plugins.
- Create an account with Google Tag Manager
- Install the plugins of the header, footer, and post injections
- Enhance Your WordPress Site Using Code Snippets
- Start Your First Tag
- Submit and Publish Your Container
- Make sure and Test that the code snippets are functional.
Components of Tags & GTM:
- Containers
- Variables and Constants
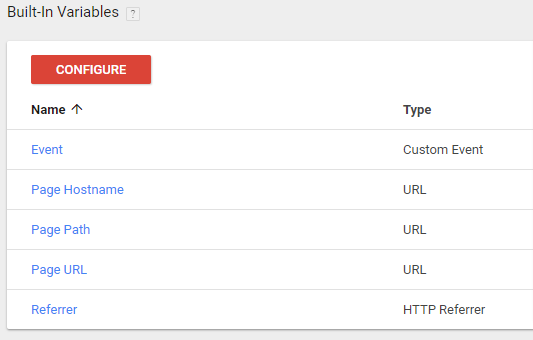
- Data layers
- Triggers
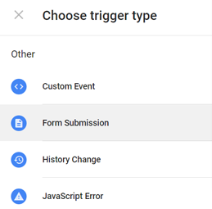
Some of the helpful GTM features include:

- Asynchronous tag loading
- Define reusable variables
- Mobile app and AMP support
- Sequencing, blacklisting, and Tag pausing
Final Words
With Google Tag Manager, you can manage all of your tags from a single dashboard. Google’s Tag Manager Guide is worth reading even if you’re not a developer because it does a fantastic job of describing some of the ideas associated with GTM and includes a ton of useful information about how to utilise it. You ought to have all the knowledge necessary to make the most of GTM with the help of all these resources.


